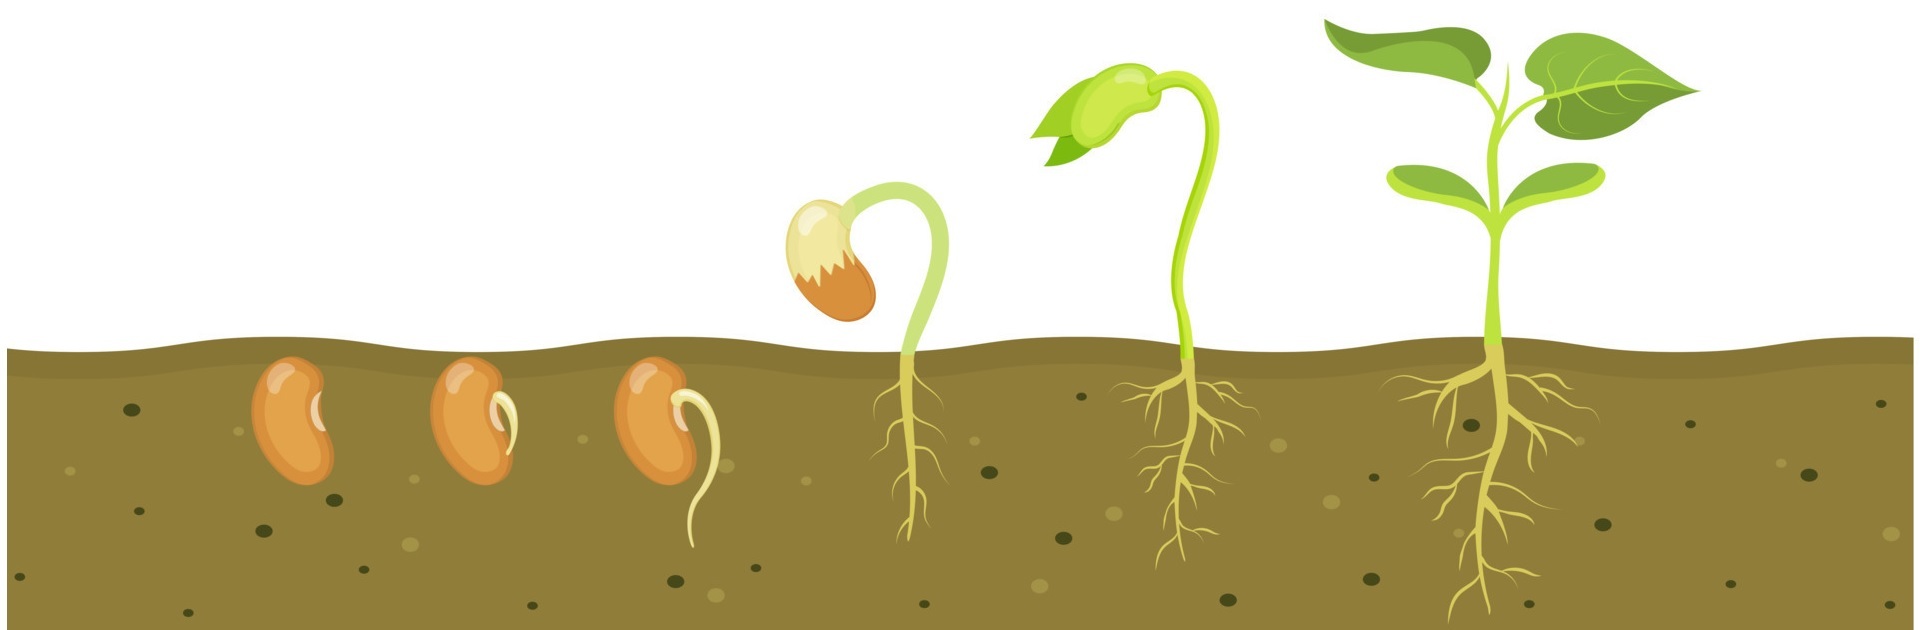
Germination is the process of a seed turning into a young new plant. To achieve successful germination, the seed requires the right conditions. If you have a pack of dry seeds they will remain as dry seeds! The seed must be placed in a moist growing medium, such as soil, rockwool, or even a wet paper towel. Seeds are not too picky about what they are planted in. Seeds are picky about moisture though. The growing medium should be moist 24 hours a day. At the right moisture and temperature levels germination begins to take place.
During germination the seed absorbs water which results in rehydration. Seeds generally germinate best at temperatures of 65 – 80 degrees Fahrenheit (18 – 27 degrees Celsius). Once the seed is rehydrated at the right temperature levels, metabolic activity resumes which leads to cell division. Roots begin to form and ultimately, a young seedling emerges.
Technically - a seed is a plant embryo and a living organism in a dormant state. Germination is the process that awakens the seed from dormancy.
Why You Should Learn to Germinate
Learning how to germinate is a very useful skill to know. Especially if you have a garden! It is useful for a few reasons:
• You are more autonomous. You have more power and flexibility in what you can grow.
• Seedling purchases and subscriptions are over-priced.
• Live seedlings often arrive damaged, stunted, or not alive. This wastes time.
• Seeds can germinate in the same time it takes to receive a shipment.
Germinating your own seeds will save a lot of money in the long run. Once you learn to germinate, it is a skill you'll have for the rest of your life. There's also a great sense of satisfaction in planting a seed and watching it grow.
About Rockwool
Note: Rockwool cubes are included with all GX Towers.
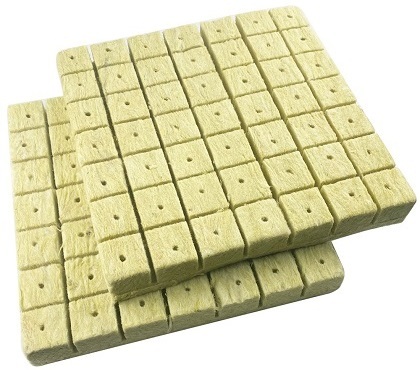
Since hydroponic systems do not use soil, alternative growing mediums are used to support plant roots and the base of the plant. By far – the most popular hydroponic growing medium is rockwool. Rockwool cubes to be more precise.
Rockwool is made of molten rock that has been spun into fine fibers. These fibers are what gives rockwool its wool texture. Due to the high heat involved in the manufacturing process, rockwool provides a bacteria-free, sterile medium in which to grow your plants.
In addition, rockwool has certain properties that make it great to use for germination:
Water retention – rockwool fibers are great at retaining water. They don’t dry out easily and hold water for a long time, ensuring consistent hydration for seeds.
Porous nature – at the same time, rockwool fibers are porous so they don’t hold too much water either. It is really hard to under-water or over-water rockwool making it somewhat foolproof for newbies. Additionally, the porous nature of rockwool provides adequate space for roots to grow.
How to Germinate, Step-by-Step
Step 1: Soak rockwool and drain. Take a sheet of rockwool and place it in your tray. Use de-chlorinated water, with a pH between 5.5 – 6.5 Pour in water until the water level reaches about three-fourths (3/4) of the way up the rockwool. After 10 minutes of soaking, remove the rockwool sheet and place in your kitchen sink and let drain. Drain for 10 minutes, and place drained rockwool back into your tray.
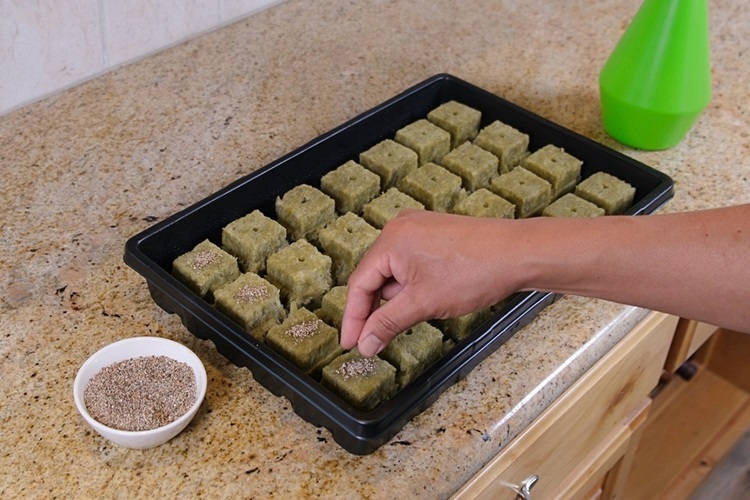
Step 2: Plant seeds. Drop seeds into the planting hole of each rockwool cube. We recommend you plant an extra seed or two, to increase your chances of germination success. Extra sprouted seedlings can be removed later.
Position each seed on opposite sides of the hole, about 1/4" down. By placing them on opposite sides, they have a bit more room. For smaller seeds like lettuce, you can use a toothpick dipped in some water. The moisture will help the seed stick to the end of the toothpick.
Once your seeds are planted, spray the top of the hole with a spritz or two of water from a spray bottle.
Step 3: Sprinkle vermiculite into the planting holes and on top of the cubes. Vermiculite has excellent water retention properties. Sprinkling vermiculite into the planting holes will help keep your seeds drying out. Don't push the vermiculite down into the holes; just sprinkle in and on top. If you push it down into the planting holes, the vermiculite can become too compact making it hard for seedlings to sprout through the top of the rockwool cube. Give each cube another misting with your spray bottle to moisten the vermiculite.
Step 4: Maintain moisture and temperature, wait for seeds to sprout. Check your cubes daily for moisture levels. Maintain about 1/4" of water (PH 5.5 – 6.5) at the bottom of the tray. The wicking properties of rockwool will wick water up from the bottom of the tray. Give your cubes a daily misting with a spray bottle to help maintain moisture.
Maintain an appropriate temperature for the plant you are germinating. Seeds generally germinate best between 65 - 80 degrees Fahrenheit (18 - 27 degrees Celsius). Using a humidity dome will help keep a warmer temperature. In the winter months, you can put a heating mat underneath your tray too.
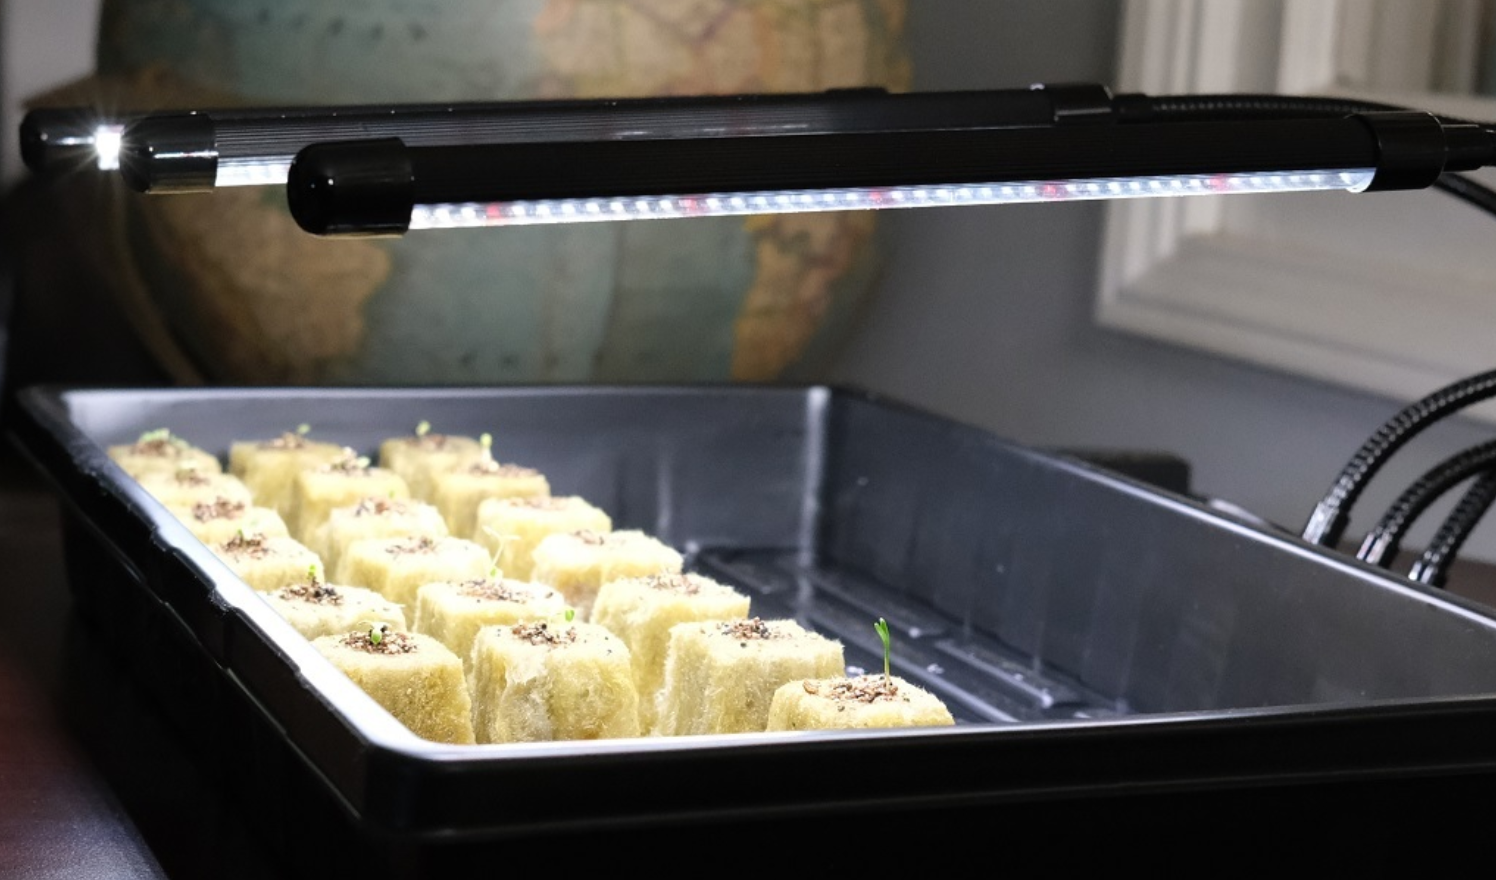
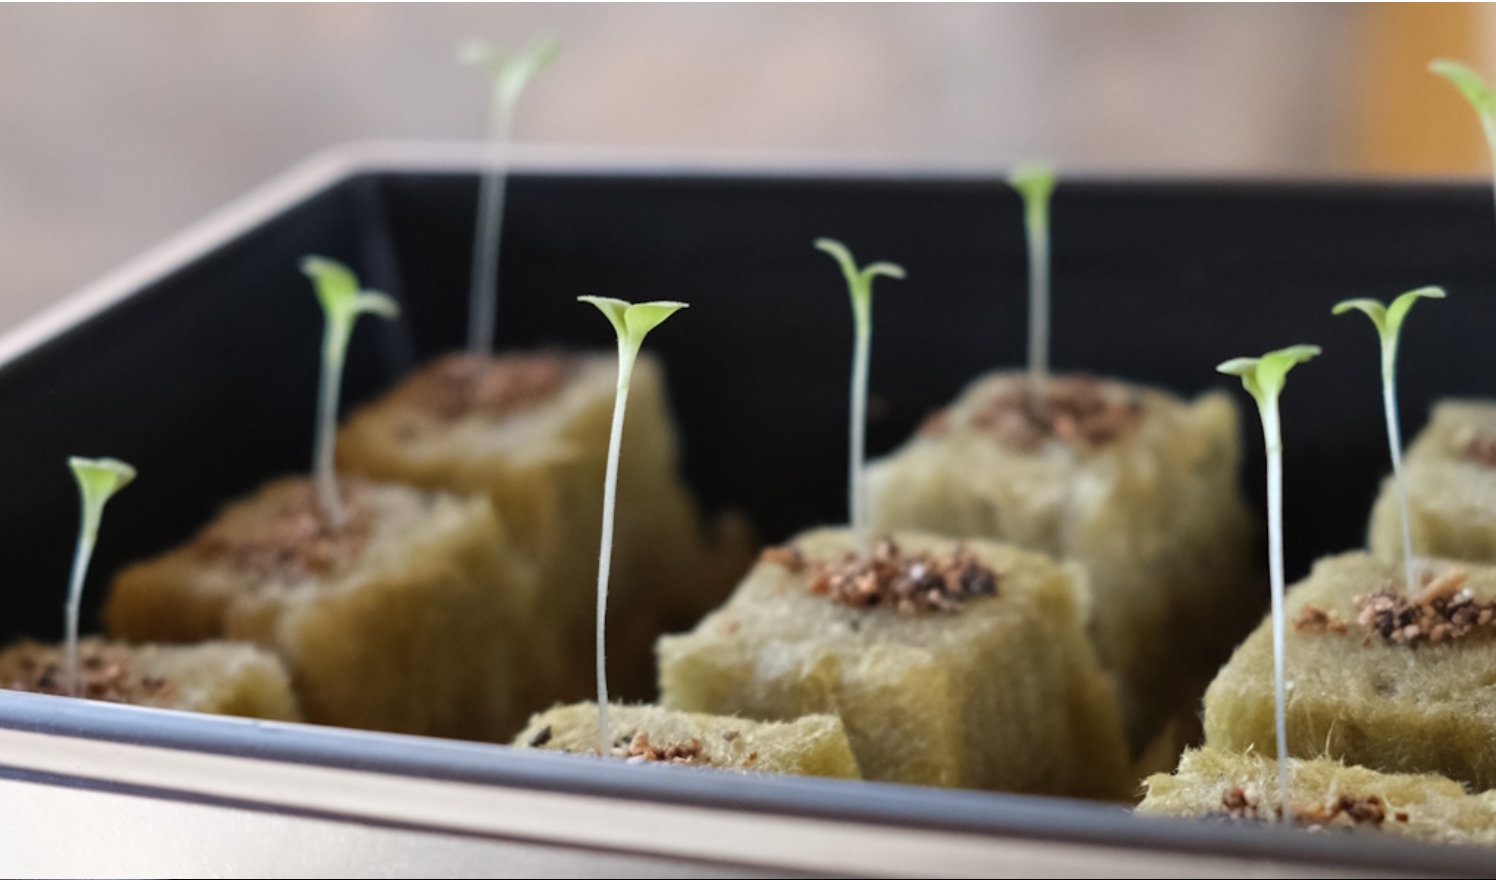
Step 5. Move sprouted cubes under a grow light. The very moment you see something green starting to poke its head out of the rockwool cube, transfer the sprouted cube under a germination grow light. Seedlings are like babies starving for food. By turning on the lights you are literally feeding your seedlings through photosynthesis – a process where plants use light to synthesize food.
Lighting placement - you want the light to be close, about 2 – 3 inches away from the top of the seedling. Basically – put the light as close as you can without burning the plant.
Lighting cycle - seedlings need about 14 – 16 hours of light per day. Continue with this lighting schedule until they’re ready to be transferred into your hydroponic system.
Humidity domes and heating mats should no longer be used with sprouted cubes. Check water levels of both sprouted and un-sprouted cubes daily, and continue with daily misting.
What happens if you're late with the lights? In an effort to survive - their stems will stretch out as they reach for the light and they will become too tall. This is known as becoming “leggy.” More on this in the “Leggy Seedlings” section below.
Leggy Seedlings
When seedlings get “leggy” this means their stems have gotten too long. Legginess is almost always caused by not lighting as soon as the seeds have sprouted, inadequate lighting, or lights being too far away. Freshly sprouted seedlings are starving for light and they’ll stretch out to get closer to it. Another cause of legginess is overly high temperatures. If you’re using a humidity dome or heating mat, be sure to remove them as soon as seeds have sprouted.
Leggy seedlings become top-heavy, and will start to lean over to one side. The stems will get too thin and too tall to support proper growth and development. Growth will be stunted and the plant will not form properly.
Can leggy seedlings be saved? If you catch it quickly, perhaps. First – bring a light source close to your seedlings, about 2 – 3 inches from the top. Check if temperatures are too high… remove the humidity dome and heating mat if you’re using one.
With traditional farming, a good way to save a leggy plant is to “pot-up.” Potting up means burying the plant deeper down into the soil. The soil itself is then able to support the sides of the stems a bit, so they don’t lean over as much. With hydroponic farming however – potting up isn’t possible because there’s no soil. So the best solution is prevention. As soon as you see something green popping out of the rockwool cube – move the seedling under light. Remove humidity domes and heating mats. Do not wait, as proper lighting is essential for successful germination and strong seedling development.
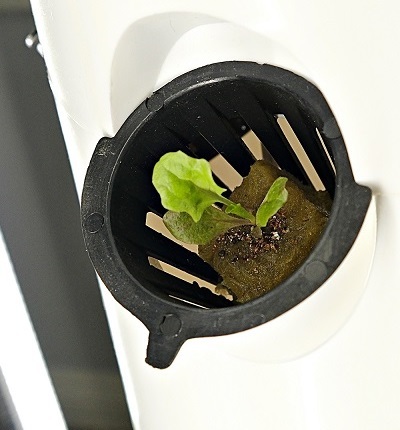
Transferring Your Seedlings
Alright – your seedlings are looking healthy and you think they might be ready to be transferred into your hydroponic tower garden. This part is actually pretty exciting. It’s kind of like watching your kid graduate. Your seedlings are graduating and moving off to college! It’s actually super easy to do as well.
There are a few ways to know when your seedlings are ready to be transferred. Look for these signs:
Four leaves have formed. This is the best sign. The first two leaves you see from the seedling are actually called cotyledons (parts of the embryo). Wait until two more leaves form underneath (four "leaves" total).
Roots emerge from the bottom of the rockwool cubes. If you see roots growing out of the bottom of the cubes, this is a good sign that your seedlings are ready for transfer.
Seedlings reach 1 – 2 inches tall. This is not a telltale sign, but more of a supporting indicator. Ideally you have the signs above to go along with this one.
FAQ
Germination is the process by which a seed grows into a young plant under the right conditions.
Seeds need a moist growing medium and the right temperature to germinate.
To germinate seeds for hydroponics, place seeds in a moist growing medium like rockwool. Keep them at an optimal temperature between 65–80°F (18–27°C) and ensure consistent moisture. This method works well for a variety of seeds, including basil, kale, and lettuce.
It depends on the seed type and environmental factors. Most seeds sprout within 3–10 days under optimal conditions. Germination time varies by plant type and conditions. For instance:
- Basil: 7–14 days
- Lettuce: 3–10 days
- Chard: 5–17 days
- Parsley: 10–14 days
- Kale: 3–10 days
- Spinach: 10–14 days
- Tomato: 10–14 days
Seeds need a moist growing medium and the right temperature to germinate.
Seeds like lettuce and kale can sprout in as little as 3 days under optimal conditions. Slower seeds, like cilantro, may take up to 21 days.


